Showing posts with label homeschooling. Show all posts

Tuesday, August 25, 2015

abc pencil wreath

Need something to jazz up your classroom door or wall? I saw this wreath in a magazine (I can't recall where) a couple of years ago.

I purchased the cork hot pad and pencils from the Dollar Store. I bunched the pencils into groups of three and got crazy with the hot glue gun. I finished the center off with some large scrapbook letters I had on hand. The wreath is mounted to the door with Command Strips.

This is probably the easiest wreath I have ever made. Happy decorating!


Monday, August 24, 2015

tunnel book report

I wanted to help my kids make their book reports come to life! I found a fabulous YouTube tutorial on how to make a tunnel book! (link below)

Open the front cover and you see different layers of pictures which adds depth and the 3D look. My daughter typed up her story and pasted it to the insides of the front cover.

Take the first picture out and you see the second "scene" of the story.

We used an exacto knife to cut out windows in each scene.

Another close up picture of a scene.

These are the five scenes in the story. You can see that we started cutting out more of the cardstock with the first layer and decreased the amount cut out with each scene. The last scene has only a little cardstock cut out near the sun. 

Want to try this? This guy has a fabulous YouTube clip that walks you through all the measurements and how to put it together!


This tunnel book gives a whole new meaning to the phrase "book report." A tunnel book can be used across the curriculum and can be attractive as an alternative to the "old school" book report. It appeals to students who enjoy drawing, as well as helps to assess their ability to express themselves via a personal narrative or summary of what they've already read. Students love the chance to make something 3D using minimal materials.


Tuesday, March 10, 2015

paul revere puppets

Creating puppets is a great activity for multiple ages. Even the big kids got into these!

I used what we had on hand--I had brown or white paper bags to choose from, construction paper that we cut to look like coats, cotton balls (though one of my daughters wanted to make regular hair), feathers, google eyes and markers. For the hat, I made a simple pattern and then cut it out multiple times.


While the kids created, we listened to a SOTW audio lesson. I also read a short book about Paul Revere to them. Then I let them chat and have fun creating with their friends.


A few of our favorite Paul Revere resources:


Monday, November 10, 2014

moon phases with oreo cookies!

This idea is all over Pinterest, so it is not my original idea. I did, however, turn it into a "book report!"

My daughter wrote a short paper about the moon and it's features. We simply divided it into four sections and glued it to the poster board. I happened to have some poster board on hand from the dollar store and we glued two sheets of black construction paper on top.

The "world" is a sticker from Gymboree that I received with gift packaging years ago--saved it! You could simply print an image from Google and paste it on. I used hot glue for the Oreos. Easy peasy. This project did not take long and the kids LOVED it! Of course that may have been because they got to eat the other half of the cookie and frosting . . . but I tell myself it's because they love being educated! 

Tip: Target sells Oreos in a pack of 10 in the check out lane for $1.00--then you don't have to buy an entire package!

Thursday, October 9, 2014

solar system with shaving cream

This was such a fun project! We are learning all about the Solar System around here and I discovered this "puffy planet" idea here. She gives a full tutorial on the ratio of white glue and shaving cream. Just add food coloring for color!

Each of my kids made their own and loved swirling the color until they got it "just right." I purchased thick, black poster board from the Dollar Tree for the background.

Who knew shaving cream and white glue could be so much fun!? We added different types of glitter with a glue stick to represent the stars. The "asteroid belt" was made with thick glitter, micro beads and small blue beads--I just used what I had on hand.

Overnight a few of the planets imploded on themselves--too much shaving cream I guess. My kids still thought they looked cool. The kids used a silver chalk pen that I had on hand to label the planets. This project took a couple of hours and the glitter made a huge mess, but it was totally worth it. My kids LOVED this project! (Ages 10, 8, and 5) And now they know all the names of the planets and where they go!

8-year-old

5-year-old


Monday, October 6, 2014

benjamin franklin's kite

We are still in the midst of studying the Revolutionary War. This week we tackled Benjamin Franklin and we made kites! This was a project that all ages enjoyed. 

Our homeschool neighbors are joining in the history fun this year.

One of my daughters got creative and added the "key" to the kite!

Want to see how to make the kite? I found the tutorial here.


Our favorite Benjamin Franklin books:

(Value Tales Series)

(by Ingri D'Aulaire and Edgar Parin D'Aulaire) 


Sunday, September 21, 2014

revolutionary war shoeboxes

I love these TOOBS that you can find online or at Michael's and Joann--where you can use a coupon! There are so many fun things you can do with them. We decided to make a Revolutionary War scene as we are studying the American Revolution. Each of my girls are currently working on writing a short paper about the war as well. I suggested one girl pretend she was a Loyalist and the other a Patriot--though neither of them want to be the Loyalist!

In addition to the TOOBS, we used rocks and some moss that I purchased from our local craft store. We used acrylic paint on the inside of the shoeboxes. A hot glue gun was used for the rocks and to secure the soldiers.

Even my 5-year-old got in on the action!

We'll be covering the Civil War later this year--they have both sides in a TOOB as well! We'll have to come up with something new for that war. Want to see another TOOB idea? Check out the Jamestown Fort that we built!

Sunday, July 13, 2014

story of the world: volume 4 lapbook

It's here! Thank you to those of you who are so excited about Story of the World and lapbooking!

For the Modern Age, I thought a computer themed lapbook would be appropriate. I found this clip art on google and put it in a file for your use if you would like to decorate your file folder the same way.
Download here: Monitor and Keyboard Clip Art for File Folder


Please download the lapbook file and come back to leave a donation.

Download here: Story of the World Volume 4

Suggested donation: $5

All proceeds received will go towards the ministry my husband and I have of sending couples to a week long marriage retreat at the JH Ranch. Blessings to you!

Here are a few examples of what you'll find inside--there are 42 lapbook elements. This is only a sampling of 3 chapters:


Leave me a comment and say hello! Happy lapbooking!

Sunday, February 23, 2014

polar regions

This was such a fun topic to study! Only because I am past the baby phase did I decide to tackle the project below:


As much as I'd love to say that my kids built this on their own . . . this was a mom job. We are not closet milk guzzlers--I drove to three coffee shops every day for 8 days straight. Thankfully, the coffee shops were all within a mile of each other. They were each kind enough to save milk jugs for me and were eager to see the finished product. (I picked up in the afternoon when they were not crazy busy.) Each day I spent 45 minutes rinsing the jugs out with hot water and a tiny drop of soap. I then threw them outside on my back patio to dry. 

After we built the igloo, we printed the above picture, glued it to a piece of cardstock, and my kids wrote thank you notes on the cardstock. (Forgot to take a picture.) We also gave each store a bag of Hershey's Kisses with a cute tag attached that said, "Eskimo Kisses for You." 

My inspiration came from THIS VIDEO. They show you the best way to build the igloo--great tips!
We had to use a high-heat glue gun, which is why I ended up building it--though my kids brought me all the jugs and helped hold them together. 

Total milk jugs: 268

We found so many fun Arctic, Antarctica, Penguin and Polar Bear videos on YouTube and Amazon Prime. We also checked out multiple DVDs from our library. The resources for this topic are endless.

My favorite activity resource book: Polar Regions Activity Book
Included are recipes, activities, crafts, literature lists and more. I highly recommend this book!


Friday, December 6, 2013

toilet paper roll gingerbread house

We had fun turning our Pilgrim log cabin into a GINGERBREAD HOUSE! I figured if we were going to have this massive house taking up space, we needed to enjoy it for one more month and do something fun with it! It comes down in January. Merry Christmas!


In case you missed the Pilgrim log cabin, SEE HERE.

Monday, November 11, 2013

poster learning and fun with velcro! (plus free download)

I first discovered what fun these posters could be when I attended a workshop by Sue Patrick at a homeschool conference. She sells some of her posters already made HERE. I couldn't afford the pre-made posters, so I made my own. You can purchase all of these posters online, but I was able to purchase and laminate mine at Lakeshore Learning Center. 

The idea behind these posters is for learning to be FUN and INTERACTIVE! Rather than trying to memorize the poster by looking at it--get involved with some velcro! This is a great way to learn for those kids who have to touch everything!

I purchased two of the same Skeletal System Posters. I laminated both. I then covered up all of the words with blue Duck Tape. Using the second poster, I cut out all of the words and adhered them to the first poster with velcro. Purchase Skeleton Poster. (This one is more money than I paid, but I couldn't find it elsewhere. You can probably find something similar at Target or your teacher resource store for less than $3. I paid $2.50 for this one.)

I love clear velcro because it does not distract from what is going on in the poster--this is especially helpful for the next poster . . . Geography Terms.

Want to learn all 46 Geography Terms? I typed them up and you can DOWNLOAD them HERE for FREE! Print on colored cardstock and laminate for durability.

Purchase Geography Terms. You only need one. By the way, I wouldn't recommend giving all of these definitions to your kids in one pile--a tad overwhelming. Have your student master various sections of the poster before moving on--perhaps 10 at a time depending on the age. Make your student feel successful!

You can purchase CLEAR VELCRO by the yard at Joann--don't forget to use a coupon! This is much cheaper than the individual velcro dots.


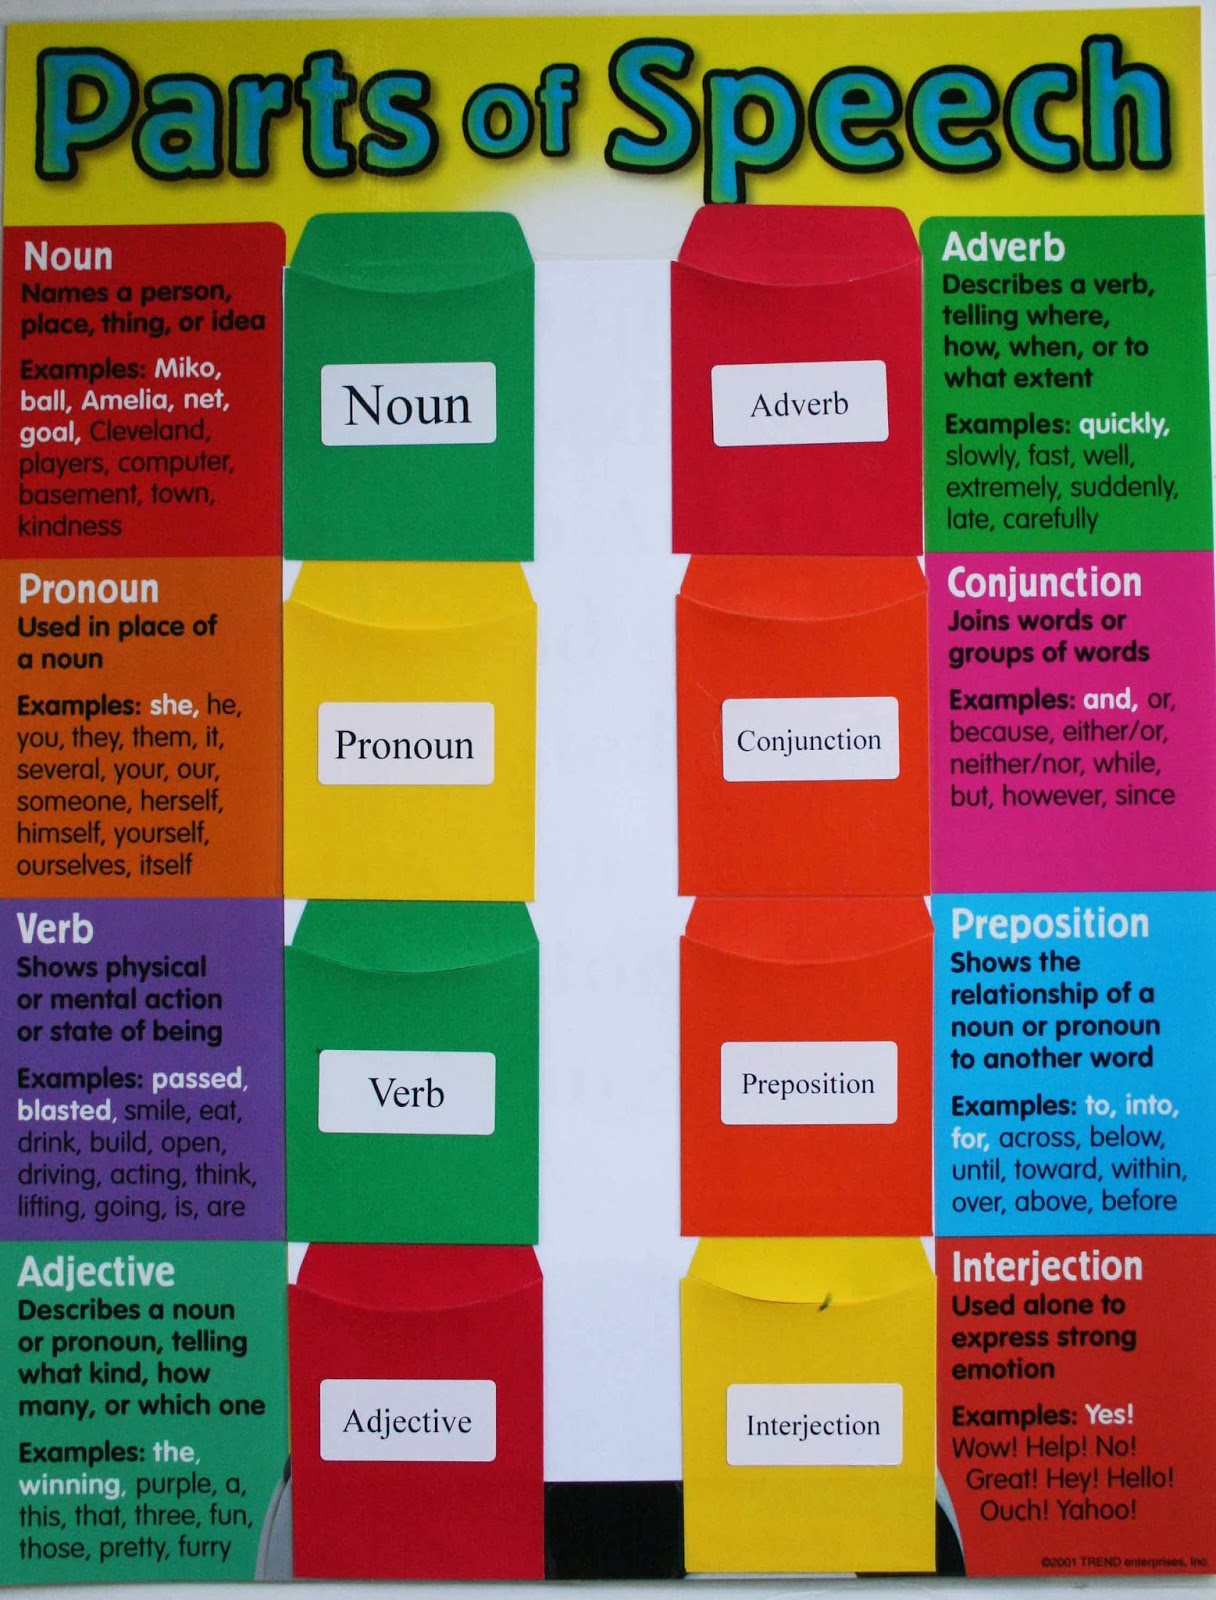
For this Parts of Speech Poster, you'll need to cover the middle section (that has multiple words on it) with white paper and then laminate. Next, you'll need library card holders from any office supply or education store. Add parts of speech labels (or write them on) to each holder. We all have a stack of word cards/flash cards somewhere--have your student put each word in the correct library card holder. Purchase Parts of Speech. You'll only need to buy one.


I laminated two Solar System Posters, used black Duck Tape to cover up the planet names, cut out the planet names from the second poster and put the names on with velcro. Purchase Our Solar System. Remember you'll need to buy two!

Have fun learning! Have questions? Feel free to send me an email.


Sunday, November 10, 2013

early american history fun (and a pilgrim house made of toilet paper rolls)

The Pilgrim log cabin. I found this idea here. This took me months of saving toilet paper rolls--and I am so grateful for all of the friends who helped by saving their stashes too! (It's just shy of 600 rolls.) My dad built a simple wood frame for the house and I simply glued the rolls on with wood glue--while the boards were lying down flat. For the roof I purchased brown paper from the Dollar Tree and we put clear packing tape in the places that we hammered tacks into the wall. We will be leaving this up to play in for awhile. It takes over half of my dining room, but the kids love it!

Inside the house.

Ready for some fun!


My mom made all of the white Pilgrim elements of my costume which I threw on over 
a black skirt and shirt. Since we were in our front yard the majority of the time, 
I received many stares and comments from my neighbors. (I know that they secretly wish 
they had a Pilgrim costume too!)

Our church has a farmer's market once a month. The gal in charge blessed me with all of these pumpkins and corn stalks for free! After the last service and I was able to take all of the leftovers. Each of the kids got to take home a pumpkin and some Indian corn.

We made a paper mache Plymouth Rock.

My kids helped me draw these with chalk on our driveway.

Indian decor--thanks to my brother-in-law, Mark.

As kids entered our home, they grabbed a job card of an early colonist. After everyone was seated, the kids came out of the Pilgrim house one by one and read what they did for their job. I found these job cards at Teachers Pay Teachers for $4. They were perfect for this event and you can find them HERE.

My kids drew pictures of all the Indian symbols that were used for communication. 
Faith wrote a little description about Indian symbols and we put it up for others to read.

Before photography, the middle class made silhouettes. We had fun making these and 
Paige wrote a report about them. I had the kids and moms guess who was who. 
Most got Paige and Faith mixed up. 

The kids were amazed that our country began from such a small area. We typed up some things 
we learned from each colony/state. I drew the map on 2-large post-it notes and adhered it directly 
to my painting--it came off easily.


We talked about quilting by hand--I'm thankful for my machine.
My great-grandmother made this beautiful quilt by hand.

The wall of corn was fun to make! We learned how the colonists grew beans up the stalks of corn 
(as well as squash) and that they used fish for fertilizer--Squanto taught them how to do this. 

My kids finger painted the corn. 
They wrote several uses for corn on the tags.

Each mom brought a food item from early colonial times. 
I made hasty pudding and candied orange peels. Most pulled their recipes from online somewhere. I pulled my recipes from Colonial Kids Activity Guide. This guide was so helpful in planning this event!

I had each family bring a set of cleaned out tuna cans. My husband cut pieces of wood approximately 18" long. Drill a tuna can to opposite sides and try to flip the bean bag from one to the other with a flick of your wrist. I attempted to demonstrate this and could not do it. Several 9-year-old boys were able to do it. I purchased the smaller sized bean bags (2") from Lakeshore Learning.

This was the aftermath of the corn shucking contest. I had the kids all grab a piece of 
Indian corn and sit down. First one to completely shuck their corn stood up to win!

Corn was an important commodity with the early settlers. I had each child bring a toy they were ready to pass on to a new home. The kids each received 10 kernels of corn in a muffin cup. We split them up into small groups and they had to go around their circle and say how much they would pay--in corn--for each toy. The toy went to the highest bidder. This group of boys really got into it and were quite animated through the entire process!

An early American history party would not be complete without a Rainbow Loom bracelet to take home. I found these charms on Oriental Trading and had to order them! The Pilgrim, Indian and Mayflower charms were perfect for this event. I ordered the yellow and orange bands and the kids used their fingers to make bracelets. 

For the younger kids, they played "Pin the feather on the turkey." Just google your 
favorite free coloring picture of a turkey and have your child color it!

For this game, the kids had to push a hula hoop with a stick down the street as far as they could. The early colonists used wheels for this game which had flat sides. It was pretty tricky with these all round hula hoops! For the stick, my husband put a paint stick and a small piece of scrap wood together to from a "T"--they pushed the hula hoop with this.

"Stones Throw" is a game with circles drawn in the dirt and a stone--see how close to the center you can toss your stone. I didn't have a dirt patch around, so I drew it on our driveway and used a bean bag. A stone bounced around too much.

A simple game of tug of war. This was the highlight of the games--the kids played this for a long time! They were all stripping off their costumes by the end because they were so sweaty--and grass stained!

A successful event. Now I can take a nap. And attend to all of the other things in my house 
that I have neglected while getting ready for this party! It was worth all of the effort--my kids 
learned a TON and had so much fun doing it. 
THIS is why I love homeschooling!