Showing posts with label story of the world. Show all posts

Tuesday, March 10, 2015

paul revere puppets

Creating puppets is a great activity for multiple ages. Even the big kids got into these!

I used what we had on hand--I had brown or white paper bags to choose from, construction paper that we cut to look like coats, cotton balls (though one of my daughters wanted to make regular hair), feathers, google eyes and markers. For the hat, I made a simple pattern and then cut it out multiple times.


While the kids created, we listened to a SOTW audio lesson. I also read a short book about Paul Revere to them. Then I let them chat and have fun creating with their friends.


A few of our favorite Paul Revere resources:


Monday, October 6, 2014

benjamin franklin's kite

We are still in the midst of studying the Revolutionary War. This week we tackled Benjamin Franklin and we made kites! This was a project that all ages enjoyed. 

Our homeschool neighbors are joining in the history fun this year.

One of my daughters got creative and added the "key" to the kite!

Want to see how to make the kite? I found the tutorial here.


Our favorite Benjamin Franklin books:

(Value Tales Series)

(by Ingri D'Aulaire and Edgar Parin D'Aulaire) 


Sunday, September 21, 2014

revolutionary war shoeboxes

I love these TOOBS that you can find online or at Michael's and Joann--where you can use a coupon! There are so many fun things you can do with them. We decided to make a Revolutionary War scene as we are studying the American Revolution. Each of my girls are currently working on writing a short paper about the war as well. I suggested one girl pretend she was a Loyalist and the other a Patriot--though neither of them want to be the Loyalist!

In addition to the TOOBS, we used rocks and some moss that I purchased from our local craft store. We used acrylic paint on the inside of the shoeboxes. A hot glue gun was used for the rocks and to secure the soldiers.

Even my 5-year-old got in on the action!

We'll be covering the Civil War later this year--they have both sides in a TOOB as well! We'll have to come up with something new for that war. Want to see another TOOB idea? Check out the Jamestown Fort that we built!

Sunday, July 13, 2014

story of the world: volume 4 lapbook

It's here! Thank you to those of you who are so excited about Story of the World and lapbooking!

For the Modern Age, I thought a computer themed lapbook would be appropriate. I found this clip art on google and put it in a file for your use if you would like to decorate your file folder the same way.
Download here: Monitor and Keyboard Clip Art for File Folder


Please download the lapbook file and come back to leave a donation.

Download here: Story of the World Volume 4

Suggested donation: $5

All proceeds received will go towards the ministry my husband and I have of sending couples to a week long marriage retreat at the JH Ranch. Blessings to you!

Here are a few examples of what you'll find inside--there are 42 lapbook elements. This is only a sampling of 3 chapters:


Leave me a comment and say hello! Happy lapbooking!

Sunday, November 10, 2013

early american history fun (and a pilgrim house made of toilet paper rolls)

The Pilgrim log cabin. I found this idea here. This took me months of saving toilet paper rolls--and I am so grateful for all of the friends who helped by saving their stashes too! (It's just shy of 600 rolls.) My dad built a simple wood frame for the house and I simply glued the rolls on with wood glue--while the boards were lying down flat. For the roof I purchased brown paper from the Dollar Tree and we put clear packing tape in the places that we hammered tacks into the wall. We will be leaving this up to play in for awhile. It takes over half of my dining room, but the kids love it!
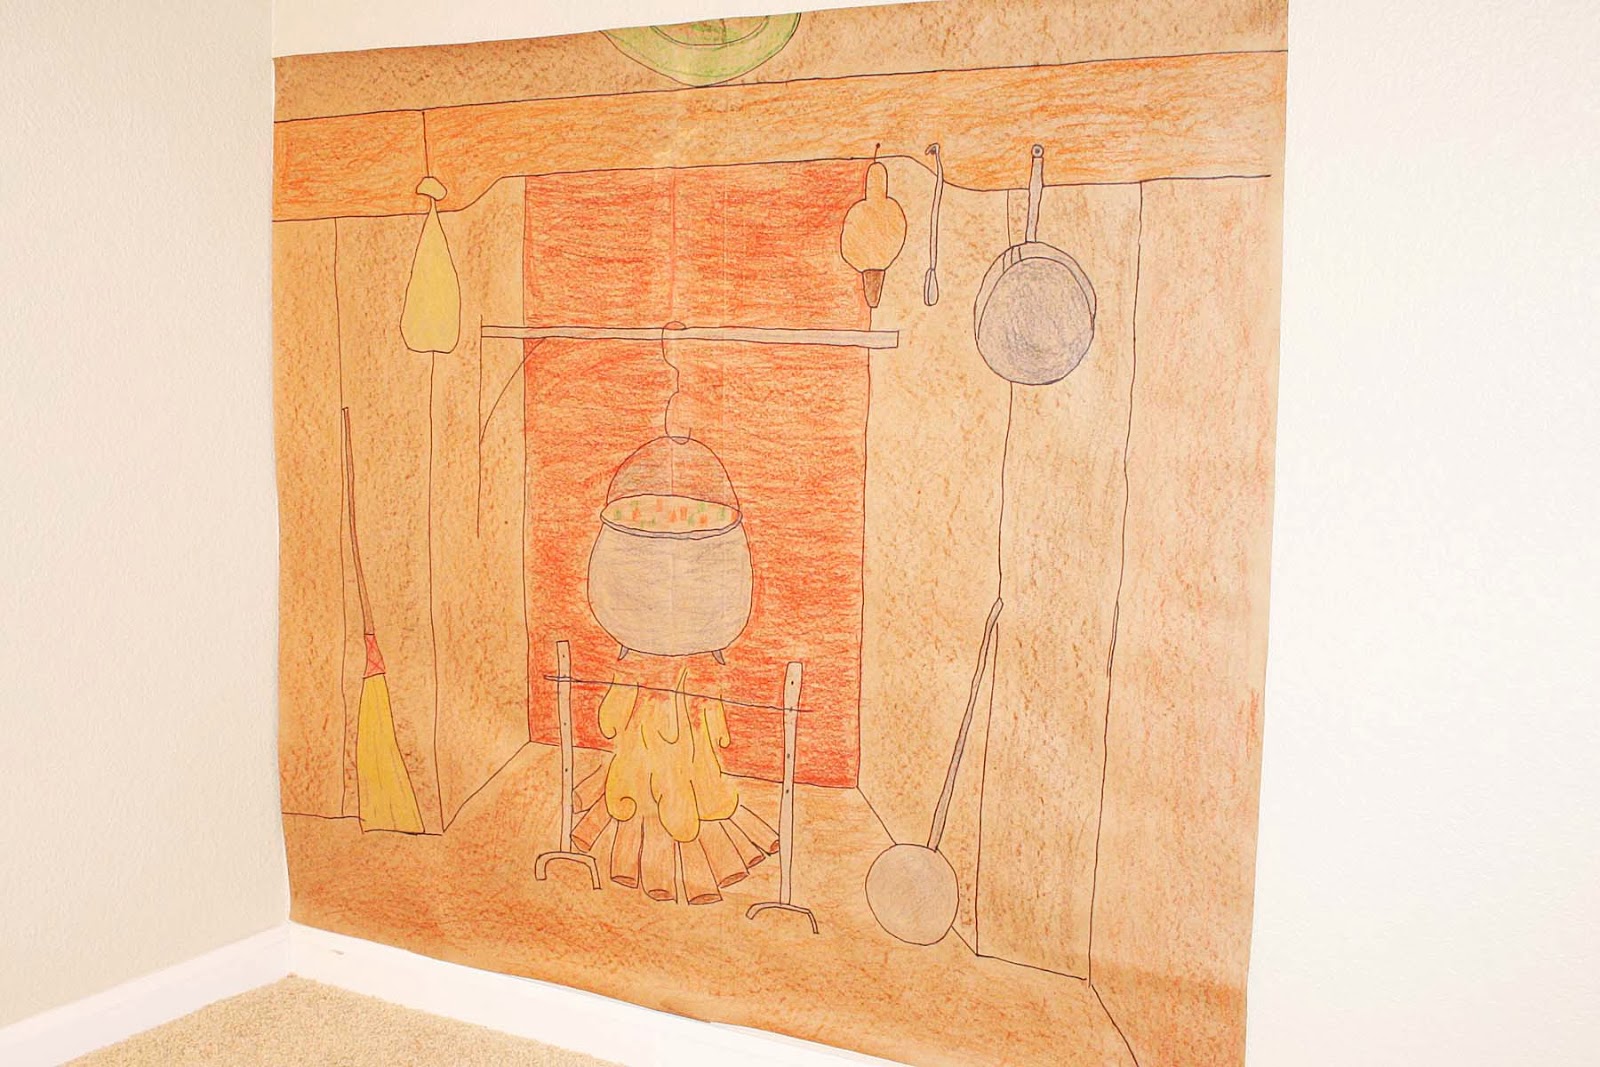
Inside the house.

Ready for some fun!


My mom made all of the white Pilgrim elements of my costume which I threw on over 
a black skirt and shirt. Since we were in our front yard the majority of the time, 
I received many stares and comments from my neighbors. (I know that they secretly wish 
they had a Pilgrim costume too!)

Our church has a farmer's market once a month. The gal in charge blessed me with all of these pumpkins and corn stalks for free! After the last service and I was able to take all of the leftovers. Each of the kids got to take home a pumpkin and some Indian corn.

We made a paper mache Plymouth Rock.

My kids helped me draw these with chalk on our driveway.

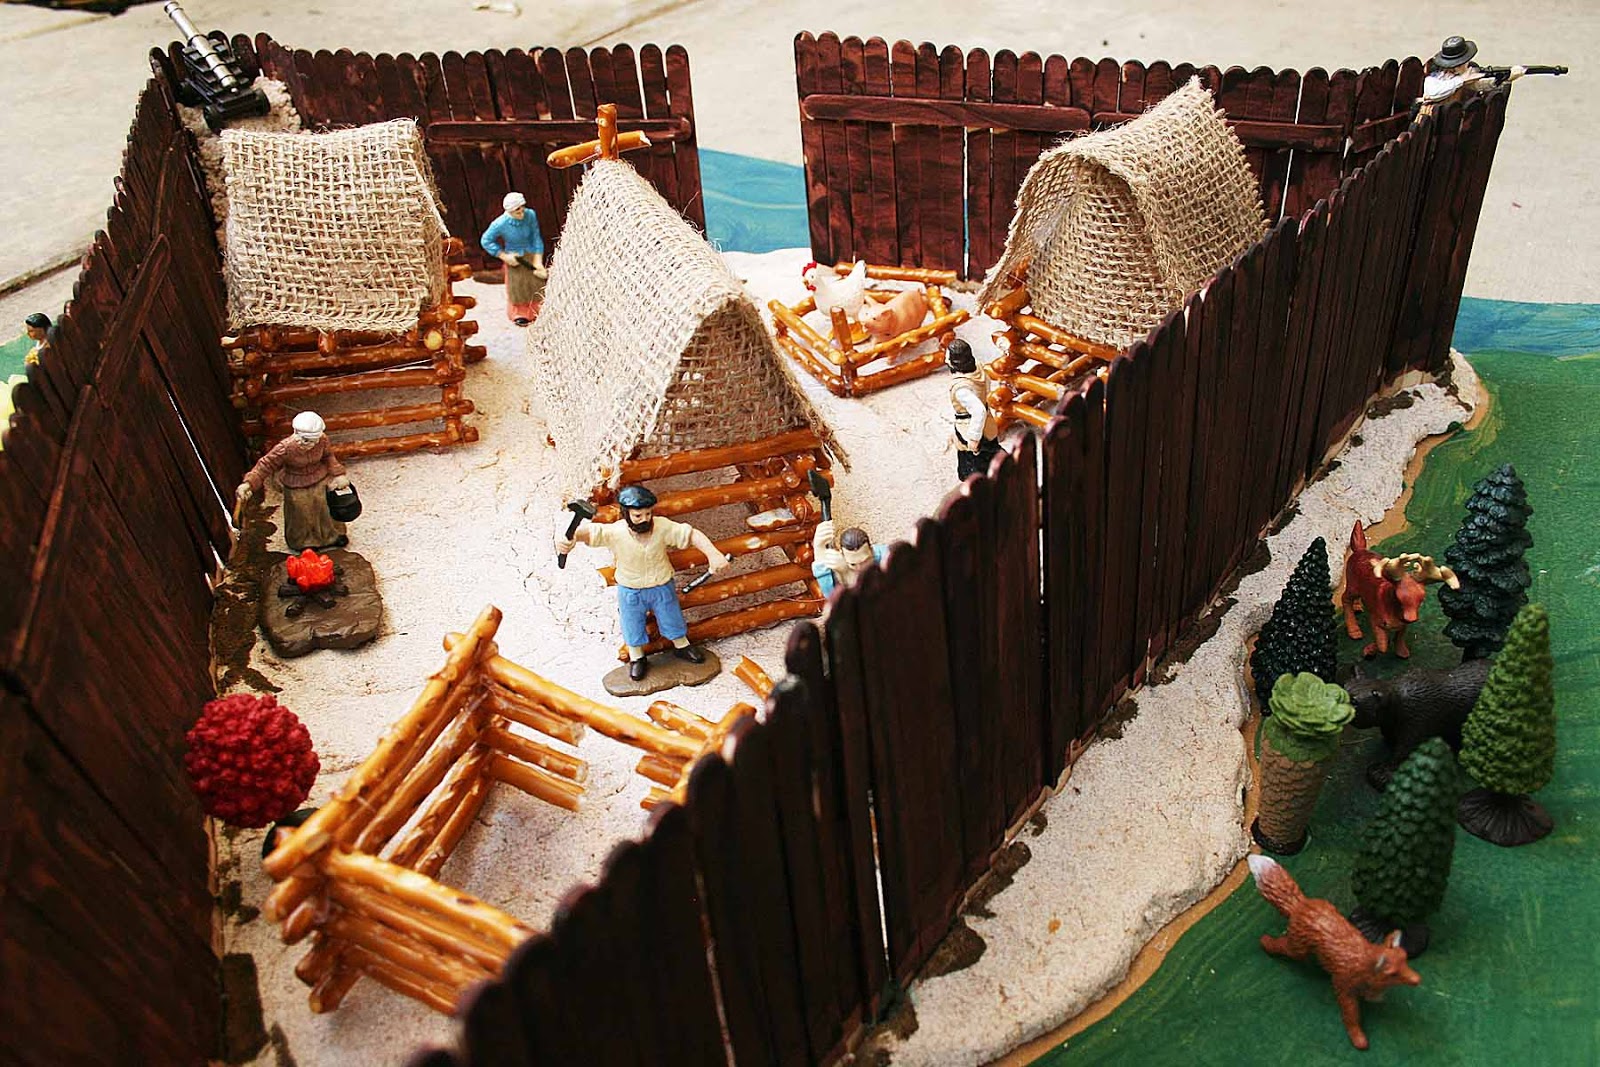
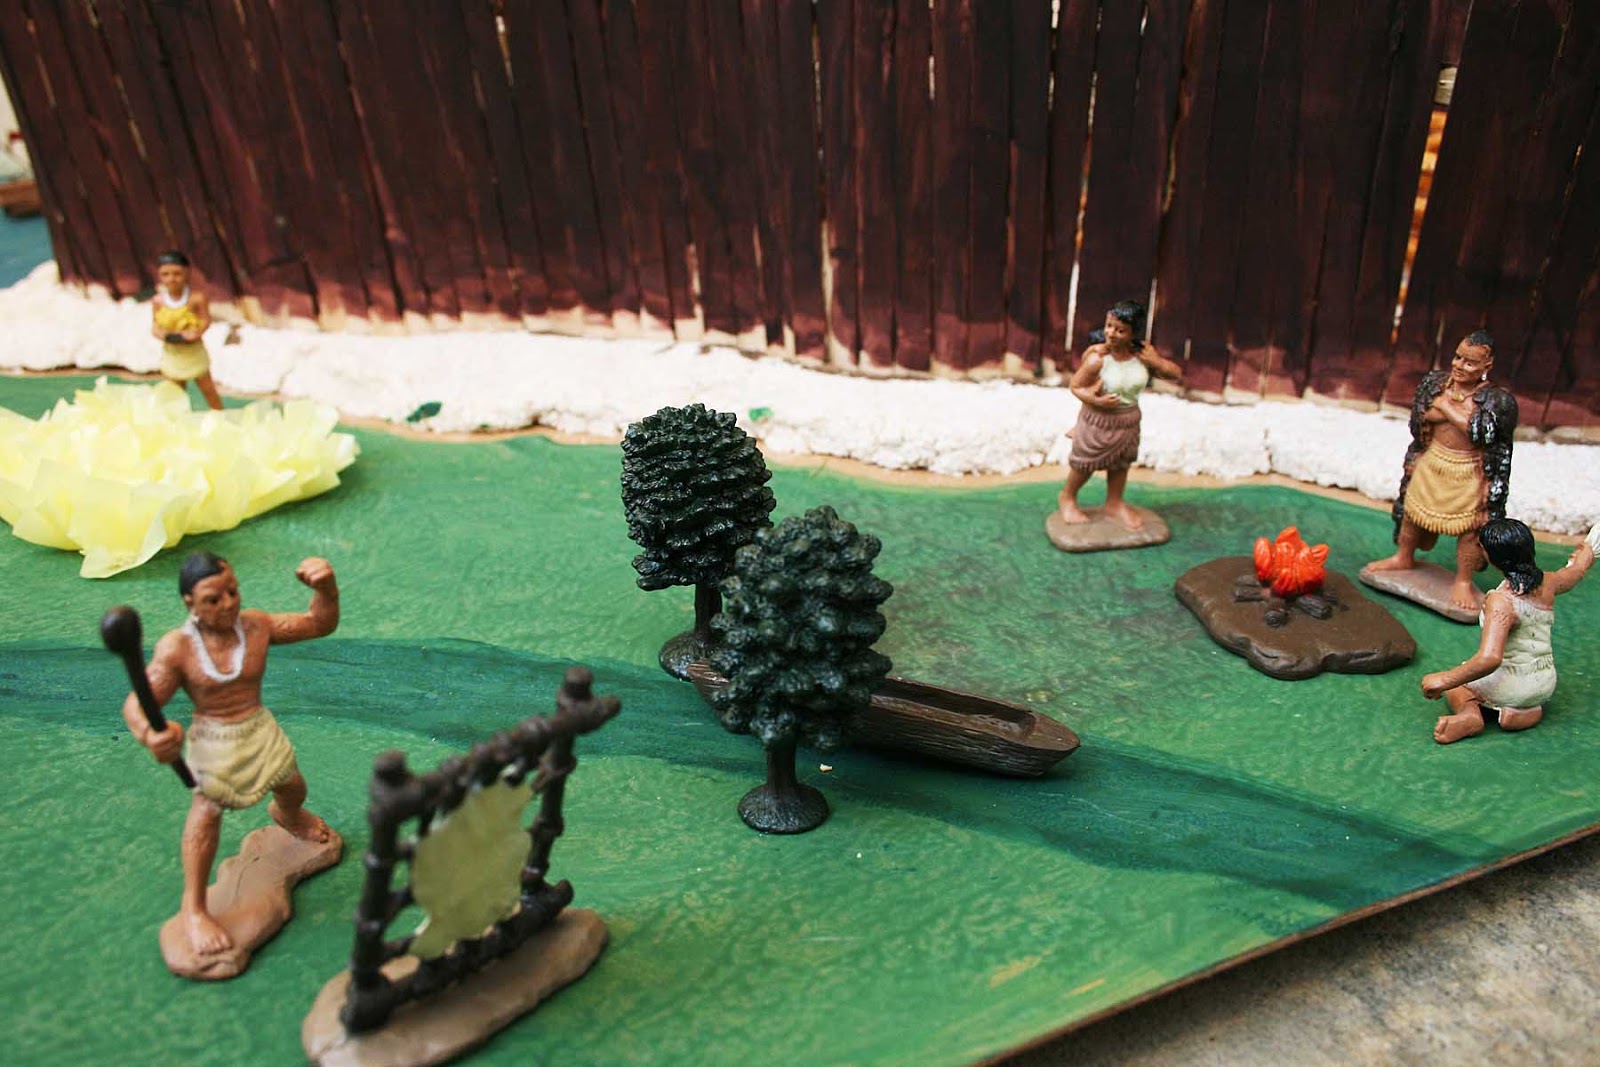
Indian decor--thanks to my brother-in-law, Mark.

As kids entered our home, they grabbed a job card of an early colonist. After everyone was seated, the kids came out of the Pilgrim house one by one and read what they did for their job. I found these job cards at Teachers Pay Teachers for $4. They were perfect for this event and you can find them HERE.

My kids drew pictures of all the Indian symbols that were used for communication. 
Faith wrote a little description about Indian symbols and we put it up for others to read.

Before photography, the middle class made silhouettes. We had fun making these and 
Paige wrote a report about them. I had the kids and moms guess who was who. 
Most got Paige and Faith mixed up. 

The kids were amazed that our country began from such a small area. We typed up some things 
we learned from each colony/state. I drew the map on 2-large post-it notes and adhered it directly 
to my painting--it came off easily.


We talked about quilting by hand--I'm thankful for my machine.
My great-grandmother made this beautiful quilt by hand.

The wall of corn was fun to make! We learned how the colonists grew beans up the stalks of corn 
(as well as squash) and that they used fish for fertilizer--Squanto taught them how to do this. 

My kids finger painted the corn. 
They wrote several uses for corn on the tags.

Each mom brought a food item from early colonial times. 
I made hasty pudding and candied orange peels. Most pulled their recipes from online somewhere. I pulled my recipes from Colonial Kids Activity Guide. This guide was so helpful in planning this event!

I had each family bring a set of cleaned out tuna cans. My husband cut pieces of wood approximately 18" long. Drill a tuna can to opposite sides and try to flip the bean bag from one to the other with a flick of your wrist. I attempted to demonstrate this and could not do it. Several 9-year-old boys were able to do it. I purchased the smaller sized bean bags (2") from Lakeshore Learning.

This was the aftermath of the corn shucking contest. I had the kids all grab a piece of 
Indian corn and sit down. First one to completely shuck their corn stood up to win!

Corn was an important commodity with the early settlers. I had each child bring a toy they were ready to pass on to a new home. The kids each received 10 kernels of corn in a muffin cup. We split them up into small groups and they had to go around their circle and say how much they would pay--in corn--for each toy. The toy went to the highest bidder. This group of boys really got into it and were quite animated through the entire process!

An early American history party would not be complete without a Rainbow Loom bracelet to take home. I found these charms on Oriental Trading and had to order them! The Pilgrim, Indian and Mayflower charms were perfect for this event. I ordered the yellow and orange bands and the kids used their fingers to make bracelets. 

For the younger kids, they played "Pin the feather on the turkey." Just google your 
favorite free coloring picture of a turkey and have your child color it!

For this game, the kids had to push a hula hoop with a stick down the street as far as they could. The early colonists used wheels for this game which had flat sides. It was pretty tricky with these all round hula hoops! For the stick, my husband put a paint stick and a small piece of scrap wood together to from a "T"--they pushed the hula hoop with this.

"Stones Throw" is a game with circles drawn in the dirt and a stone--see how close to the center you can toss your stone. I didn't have a dirt patch around, so I drew it on our driveway and used a bean bag. A stone bounced around too much.

A simple game of tug of war. This was the highlight of the games--the kids played this for a long time! They were all stripping off their costumes by the end because they were so sweaty--and grass stained!

A successful event. Now I can take a nap. And attend to all of the other things in my house 
that I have neglected while getting ready for this party! It was worth all of the effort--my kids 
learned a TON and had so much fun doing it. 
THIS is why I love homeschooling!

Wednesday, September 18, 2013

sumo wrestling with pillows and lifejackets: story of the world 3: chap. 5

If they learned nothing else from this chapter, they learned that the samurai were given new jobs and encouraged to wrestle rather than fight with swords. And "wrestle" we did!

In the activity book of SOTW 3, it walks you through how the competitors prepared themselves for the fight. One of the things they had to do was stare each other down with a mean glare.

I just love my little man's glare!

For this activity, we decided to do it on our trampoline (with a net so they wouldn't get pushed off!). My husband taped a rope in a large circle and a line down the center. They had to stand on either side of the taped line and try to push each other outside the ring. We had the kids put on life jackets, two pillows and then used tie downs to put everything together. Definitely a lesson my kids won't forget!

Thursday, September 12, 2013

eskimo craft: story of the world 3: chap. 4


This week we studied Chapter 4 in the SOTW 3. The search for the Northwest Passage discussed Canada and the Inuit or "Eskimo" people. I found this cute Eskimo made out of coffee filters and we did the same. My kids loved this easy craft.


I traced a circle using a kids bowl and we added the coffee filter behind the head for the warm and fuzzy coat. We used cotton balls, google eyes, a puff ball and some glitter glue for the mouth. To make the jacket, mittens and boots (which are hard to see) I simply folded construction paper in half and did the best I could at drawing them. The cotton balls help cover everything up so the drawings don't need to be perfect. Enjoy!

Thursday, September 5, 2013

pocahontas and captain john smith

My girls took an intro to IEW (writing) class over the summer at our local homeschool used bookstore. It was a great class to get their feet wet and a great way for me to learn how the IEW method is taught. I LOVE this writing program!


I wanted the girls to write about something they had learned from our study on Jamestown, but I wanted to make it extra fun as well! Both of my girls love crafts. I learned how to make oatmeal container dolls from a friend and I thought this would be the perfect time to make some.

I asked my 7-year-old to write a one paragraph paper on John Smith. I asked my 9-year-old to write a three paragraph paper on Pocahontas. The incentive to write was the doll craft at completion of the writing assignment.


For the clothing, we used random scraps of fabric that I had on hand--including leftover burlap from our Jamestown fort. These are small oatmeal containers with 5-inch balls for heads--purchased with coupons at Michael's. We folded up the story and put it inside the oatmeal container. We'll leave them out on display through the Thanksgiving season--they'll fit right in with all the upcoming Pilgrim crafts we have planned.

If you missed our Jamestown display you can check it out HERE.


Sunday, September 1, 2013

JAMESTOWN FORT: story of the world 3 (chap. 3) colonists and indians


We've been busy over the past two weeks! As we make our way through SOTW, we will be stopping at certain chapters and diving in a little deeper. I want my kids to grasp how difficult it was for the first settlers of our country, so we explored Jamestown in depth. I'll list all of the resources we used at the end of this post. 

As I was strolling the aisles of Joann this past spring, I came across a Jamestown TOOB. Inspiration struck and I bought it knowing that we could build a house or a fort or something along those lines. I googled Jamestown Fort and saw several other moms who'd made Jamestown forts as well--like this one here--she also used the TOOB.


I found a 2.5'x2.5' piece of cardboard and drew a triangle with a pencil. I traced the small kids cup at the corners of the triangle to make the rounded corners just as the colonists did. I traced my lines with Sharpie so that my kids could see the lines better as they spread the salt dough out.


We made three batches of salt dough for this project. I used whole wheat flour to give the "earth" a natural sandy look. Here is the recipe that I used to make one batch:

1 c. whole wheat flour
1/2 c. table salt
1/2 c. water

Mix together and then knead it to get a smooth consistency. I had to add a little extra water to get all the crumbly pieces to stick together. The kids had a great time laying down the dough.


It took some time to line up all of the popsicle sticks, but one of my daughters is a perfectionist and she enjoyed taking her time. I had to reinforce the walls by hot gluing popsicle sticks parallel to the top of the fence. It was a little tricky around the corners, but we cut popsicle sticks into small pieces to hot glue as we went around a corner. We let this dry for a day before we painted. ****A little tip . . . set some heavy things around the outside of the cardboard so the edges don't curl up. I set a few things on it, but I should have set even heavier things on the edges as it curled a little.

Next, the kids painted with tempra paint. Even my 4-year-old got in on the action. They painted the ground green for the woods and blue for the rivers.


We made houses out of pretzel sticks. Yes, I realize there are gaps, but you get the idea. My 9-year-old was able to make most of the houses on her own by using a low temp hot glue gun. We bought some burlap to use for the roofs. I hot glued the roofs on--watch out--the holes in the burlap led to a burned finger for me! After each house was made, I used some scissors to carefully cut out some doors. The animal pen was the kids idea. Whether or not they had one, who knows, but they came with the Jamestown settlers TOOB.

We couldn't forget to build a dock for the ships!

The colonists traded with the Indians for corn. We made corn out of small square tissue paper scraps. We scrunched them on a pencil top and used a glue stick to glue them down. Again, an idea from the kids!

The Indians were good at many things, including drying animals skins and making canoes.

This settler is chopping up wood and working on his house.

This aerial view gives you a better idea of where we placed everything. I let the kids set it up exactly how they thought it should look.

Resources:
We purchased each of these TOOBS at Joann with a 50% off coupon which made them $5 each.

We read so many fabulous books! Here are a few of our favorites:
Pocahontas (my favorite!)
Pocahontas: Young Peacemaker (a good read aloud)
The True Story of Pocahontas (independent reader)

One thing we discovered is that various parts of the story are different in each book that we read. For example, some books say Pocahontas died of smallpox, some say a high fever was the cause and another says she died of unknown causes. It gave us the opportunity to discuss how we can all be at the same event and yet remember it differently. Regardless of the minor differences, my kids got the general gist of what went down at Jamestown. Even Seth (at four) can recount the main parts of the story. He loves playing with the figures and moving them around while he talks about what they are doing!

Check out our fun doll book reports on Pocahontas and John Smith!

This post is part of the Classical Education Blog Carnival going on over at Half a Hundred Acre Wood. So many great resources are shared!

p.s. I'd love to see what history projects you've done that make learning fun! Leave me a comment with a link to your blog!