Thursday, August 15, 2013

science curriculum organization with lifepacs

Science is not my favorite subject to teach. Up until this year, I have done a little of this and a little of that and purchased multiple FUN kits at my local teacher store. I'm not sure who declared MESSY science experiments FUN, but it certainly was not me. In an effort to spend more time on science this year (and having FUN), I decided to go with an "official" curriculum this year.

A friend of mine has been using Lifepacs by Alpha Omega and really likes the structure they provide. I am pretty eclectic in my approach to homeschooling, so I was not sure that this textbook-y approach would work for us. I tried one Lifepac for a month last year and thought it might work for us and provide a spine for our science. I am not committing to finish every single page in the Lifepac, but we will let it guide us in our science adventures. What I LOVE is that science and God are intertwined throughout the Lifepacs--afterall, He is the one who makes everything work the way it does!

My husband blessed me with a weekend to homeschool plan--in my own house--while he and the kids were house-sitting for some friends. I took each topic and pulled any book that I had on that topic from the vast array of books that I have collected over the years. It was fun to find books that I didn't know I had (this is an ongoing problem of mine--too many books!) 

There are 10 Lifepacs that cover the year. Each Lifepac takes 3-4 weeks to complete. This Lifepac is the topic of PLANTS. I have books, a file folder game, worksheets from random science books and a plant specimen kit--I spread them all on the floor and took a picture. I had this picture printed and I stapled it to the outside of a hanging file folder.


Next, I photocopied all the spines of the books that I will (or might) use on the topic of plants. I simply placed them all on the copier at once. This will help me remember what books I have. For the books that are too small to have a spine, I put them INSIDE the hanging file folder.

Here is what I store within the hanging file folder. The books without a spine, extra worksheets that I might use (including a few for my 4-year-old so that he can feel like he is participating), a greenhouse kit, my file folder game and the Lifepacs. On that note--I have a 2nd and 4th grader. I am not going to teach two different science curriculums (I would go crazy). I ordered two 4th grade Lifepacs--one for each girl. If there is any reading or questions that are too hard for my 2nd grader, she will simply skip those sections. I also included a lesson plan that a friend of mine typed up. She included Bible, field trips, YouTube videos, BrainPop videos, snack ideas, etc. This is a place where I can write anything else that I might want to do with my kids on the topic of plants. 


I have a shelf in my closet where I store all the science books (with spines) in the order that we will use them this year. I love that we will finally be using some of the books that have been sitting on my shelves for years! 

Lifepacs are designed so that you can grab them and teach. You do not have to pull all of these extra books like I have. But I already HAVE these books and I want to attempt to use them. Also, I wanted to pull in videos, crafts and snacks on the topic--I love making things more fun! I am using the Lifepacs as a guide--as I do with all my curriculum. The curriculum does not rule me--I rule the curriculum. For my Type A personality, this is a lesson I have had to learn over the years. I continue to remind myself, "I do not have to finish every worksheet or every lesson plan. I do not have to have everything crossed off my to-do list." 

This organization system may be a bit over the top, but I thought I would share in case any of you get as excited about organizing and a new school year as I do! You can apply it to any subject and any curriculum. Have a great school year!


Tuesday, August 13, 2013

our homeschool room

Welcome to our homeschool room . . . where we do very little school! Honestly, this is where I corral all of our stuff. We school anywhere and everywhere--the sofa, the floor, the kitchen table, the back porch, the park, the library--we've even schooled at the donut shop!

I love to decorate--especially when the decor is kid related. I don't, however, have an endless budget. So, there are several DIY items in this room. I purchased a couple of things that were going to be too labor intensive for me to complete--the alphabet rub-ons I purchased from Stampin' Up years ago. The large pencil (with our last name inscribed in the middle) was my splurge from Pottery Barn Kids.


This apple tree was a fairly easy project. I lightly sketched the tree onto the wall with a pencil. I purchased three cans of sample paint ($3 each) from Lowes and it was plenty of paint. I had some light brown craft paint on hand and added inch marks from the baseboard all the way up the tree. The wood apples I purchased already painted (and cute!) from Michaels. They add a little fun dimension!


I wanted the tree to serve a purpose (beyond just being cute). On each birthday, my kids love to race into the schoolroom to get measured! I'll take their picture and in my photo editing program I type how old they are directly onto the picture. I adhere each picture to a wooden circle that I painted with leftover green paint from the tree. I adhere them with handy tack.


Years ago, Pottery Barn Kids had these Schoolhouse Utility Boards. At $169 EACH, I could not justify their purchase. But they were just so cute! I happen to have a very handy dad, so I asked him if he could make them. We ordered the bulletin boards from somewhere online and he put the rest together. I was thrilled with the way they turned out!
The game cabinet is from IKEA and the red oval bins I purchased from Target a couple of years ago. The red bins hold our flashcards and learning games.


We discovered workboxes two years ago. Love them. Can't say enough about them. But because there are a ton of bloggers out there that have blogged all about workboxes, I'm not going to go into the why and how of using them. Just know I think they are swell. When my kids finish their work from a workbox, they put it in the colored box on top until I have time to file it away in their binder.


The door behind my workboxes is a second door to the guest bathroom. We keep it closed and locked and it serves as a wall. My magnetic calendar and maps on the wall are there for us to use as we need them.


This little gem I picked up for free from someone who was getting rid of it. It was pretty dinged up, so I grabbed a couple bottles of spray paint and it was good as new! Inside the little square was a painted moon and stars. Since it didn't go with my theme, I used some of my scrapbook paper and letters and adhered my abc decor to the inside. This bookcase sits near my workboxes. I keep all of the things the kids regularly use in these cubbies. I also keep supplemental worksheets/workbooks in here--sometimes we need a break from our regular math program to do a few random and colorful math worksheets!


In our school room there is a small walk-in closet. My dad ripped out all of the closet bars/shelving. He built multiple cubbies where I could easily store all of our books. (Since building these book shelves I have outgrown this space. Now I have IKEA bookshelves in my bedroom to house all the extra books!) I keep our most used books in this closet. I have a space for Bibles, dictionaries, encyclopedias and a shelf for all of the lapbooks the kids create. I love keeping our lapbooks handy so that the kids can pull them out easily whenever they want to show them to someone . . . but that's another story. More closet pictures . . . 


On these shelves I store each child's binder, extra geography books, our science books for the year and homeschooling books that I read. My dad also left a space for the two plastic drawer towers that I purchased from Costco years and years ago. All of our craft gear goes here.


This pegboard is the backside of another bookcase which I will show you next. I bought a four-piece spice rack and put things that are hard to store in here--manipulatives in baggies, etc.


This is the bottom half of the pegboard wall. (I couldn't back up very far to take the picture, so I had to take two shots!) I had an extra kitchen storage holder that I put up to hold "busy bags" for my little guy. I also hung a paper cutter and my book loan list with a pencil attached. I loan my books a lot to friends, so it is helpful to remember who I loaned them to! Need a book loan list you can print out again and again? Here ya go.


My closet has two sliding doors. When my girls started reading books on their own, I needed storage for all of their readers. My dad added this to one side of the closet. I can still close the door over it, but there is now only one side to enter into the walk-in closet. I also store all of my audio and some educational DVD's here. It is anchored at the top and bottom--if we ever move, it will be easy to pop out and take with me!


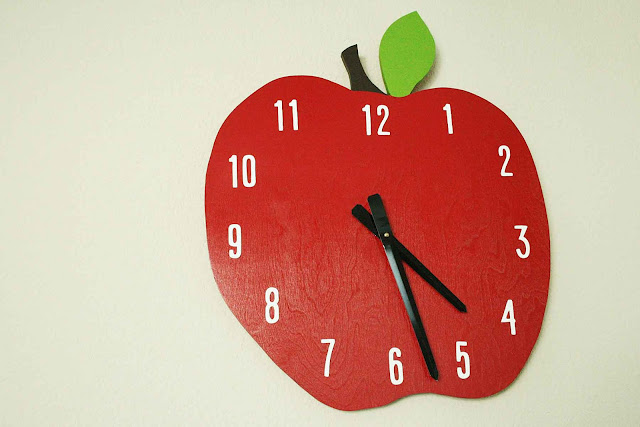
One of my favorite things in the room is this apple clock that my dad made. It's another Pottery Barn inspired piece. Instead of the $90 price tag, it cost us about $20 to make. My dad cut the apple out of wood. I painted it and added some white number stickers. The clock hands I found at Joann. This clock makes me happy every time I look at it!

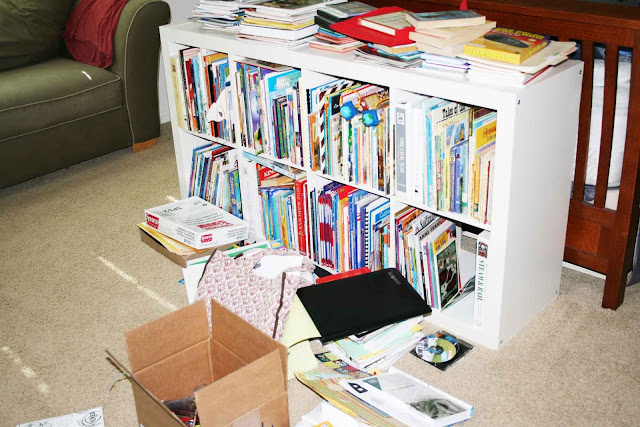
And just to keep things real here in Blogville, this is a picture of the disaster that awaits organization in my bedroom. These are all of the books I need to find homes for and put away. Another day perhaps . . . 


Monday, August 12, 2013

story of the world 3: a world of empires (chap.1) make a gold mine shaft

Today we had fun listening to the first chapter of Story of the World Volume 3. We discussed how the Spanish took over South America in the year 1600. I had no idea they took over five hundred billion dollars worth of gold and silver from the native South Americans. I love relearning history right along with my kids.


A little forewarning should you decide to do this activity . . . it's messy!

We cleaned out a trash can and added some "gold" to the bottom. We used Reese's Pieces, but you could use any yellow candy. 


Next, we dumped in five pounds of flour--that's all I had on hand. The book recommends ten pounds, but they got the idea with five.

We built a "mine shaft" with large popsicle sticks. The goal was to get to the "gold" without the mine collapsing. My girls (ages 7 & 9) spent a half hour trying to figure it out. They did a pretty good job. They also used some construction paper and scotch tape to make a few rings around the popsicle sticks. They slowly brought the gold up the shaft piece by piece. They learned how dangerous the mining job was for the South Americans. 


This activity would not be complete without a little free play. They added water to the flour and spent an hour making creations in the backyard. Then they spent another half hour in the shower trying to get all the dried flour off their arms! 


Saturday, August 10, 2013

story of the world: volume 3 lapbook


I've received numerous emails asking for these lapbook elements and I'm excited to have them available for you today!


Please download the file and come back to leave a donation.

Story of the World Volume 3 Lapbook

Suggested Donation: $5

All proceeds received will go towards the ministry my husband and I have of sending couples to a week long marriage retreat at The JH Ranch. Blessings to you!

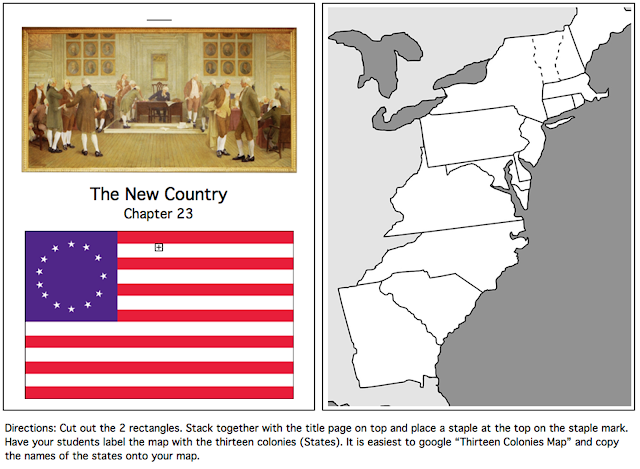
Here are a few example of what you'll find inside--there are 42 chapters. This is only a sampling of 3 chapters:


Visit throughout the year and I'll be sharing many of the SOTW 3 activities that we do. I'll even share some non-SOTW history projects that take place during the same time period. I have some FUN ideas planned! You can find the "Story of the World" link on the right hand side of my blog--this is where you'll find my most recent posts. 


I purchased "natural" or "recycled" file folders from my office supply store. My daughter made a "log cabin" to store all of our lapbook elements. We cut apart an extra file fold to make a roof and a door. I used clear packing tape to add a door that opens. I love the cute pilgrim waiting inside! I purchased the pilgrim stickers at Joann. The old letter stickers are from my scrapbook stash.


I trimmed the tab off of one file folder and glued it to the inside of the next file folder. You will need to add more file folders and some cardstock flaps so that you are able to fit all 42 chapter elements inside this "book." My suggestion is that you start with this base that your student can decorate (the fun part). Work on your elements throughout the year (store them in a ziploc bag) and then paste them all in at once. This way you are able to add the proper amount of cardstock flaps and file folders. I do not know what the "proper" amount is or I would tell you! We'll be working our way through the book this year as well!

I'd love to hear any fun ideas you have for the year that revolve around history. Leave me a comment and and say hello!

*These lapbook components and it’s author are neither affiliated with nor endorsed by Susan Wise Bauer or Peace Hill Press.